Recently I have created a sunburst background (please check the 4K Wallpapers gallery) photo and showed it to someone in the office. That person was not a novice to photography and yet he wasn’t sure how exactly to create such a starburst effect. The camera settings, image framing, etc. This case surprised me because, in reality, it is relatively easy to do. And in this article, I’m going to give you a recipe for such photos with several examples.
What Is A Sunburst Effect
First of all, just to clear it off – sunburst and starburst are the names of the same effect. Now that we have removed the confusion let’s get back to the meaning of the term. Those rays are no magic, and they originate from the way cameras are built. The aperture has blades, which you can easily see looking through the front of the lens. So, when the light comes in through the lens, it diffracts (bends) along the blades edges creating a star on the final image. Hence, this fact leads us to the conclusion that the first and foremost thing that affects your star effects is your lens. It may make sense to try different lenses you have and pick that one you enjoyed best.
What Affects Sunburst Effect
We are still talking about the technical side and equipment. The things that affect the number and the crispness of the rays are:
- Your lens (we already covered this);
- Aperture – the smaller is the opening, the better rays you will get. This way, at f/4 you will get no rays with f/16 – f/22 the most crips look that your lens can produce;
- Focal length – shorter focal length provides more prominent stars. At 20mm you will get a better star than at 100mm ;
- The power of the light source – the Sun gives a more noticeable result that the street lamp;
- The front glass clarity – this is VERY important! When you have lots of dust or even grease (makes me shiver) on the front lens you just cannot get good photos shooting into the Sun. The reason is that every little spot will turn into a huge shiny circle on the final picture and believe me, it’s tough if not impossible to get rid of during editing;
- Background – we’ll get to this below.
How To Compose for Starburst Effect
Let me tell you an obvious thing – bright objects are seen better on dark objects. How was it, pretty evident? The same thing applies to this kind of photos we try to master. To make your photo and your rays stand out, they should have a darker background! Therefore there are so many pictures out there with the Sun just appearing from behind the mountain or shining through the tree branches. Photographers make a darker background!
The Large light source will produce a large white area with fewer rays visible and prominent. Remember this: the perfect light source is powerful and small. Aforementioned is another reason to hide the Sun partially behind something. The Sun itself is big and strong and will dominate your photo without any significant star effects.
Aperture For Starburst Effect
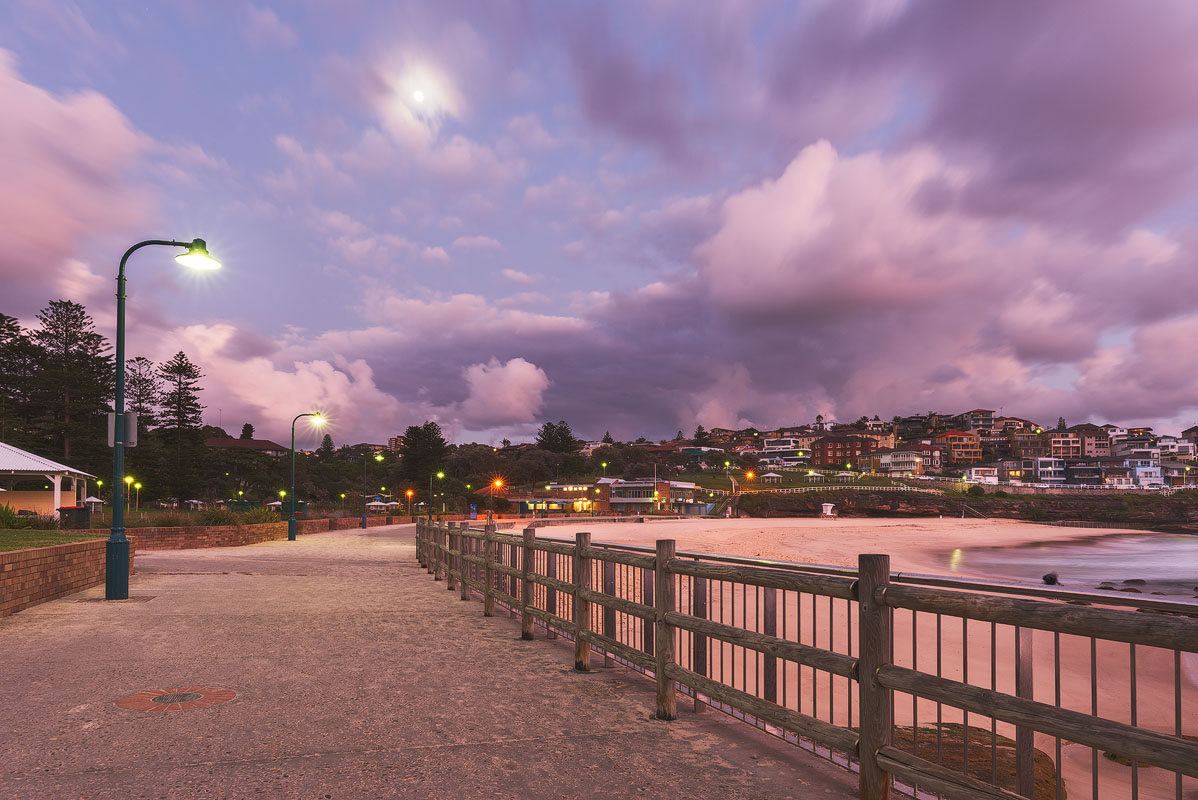
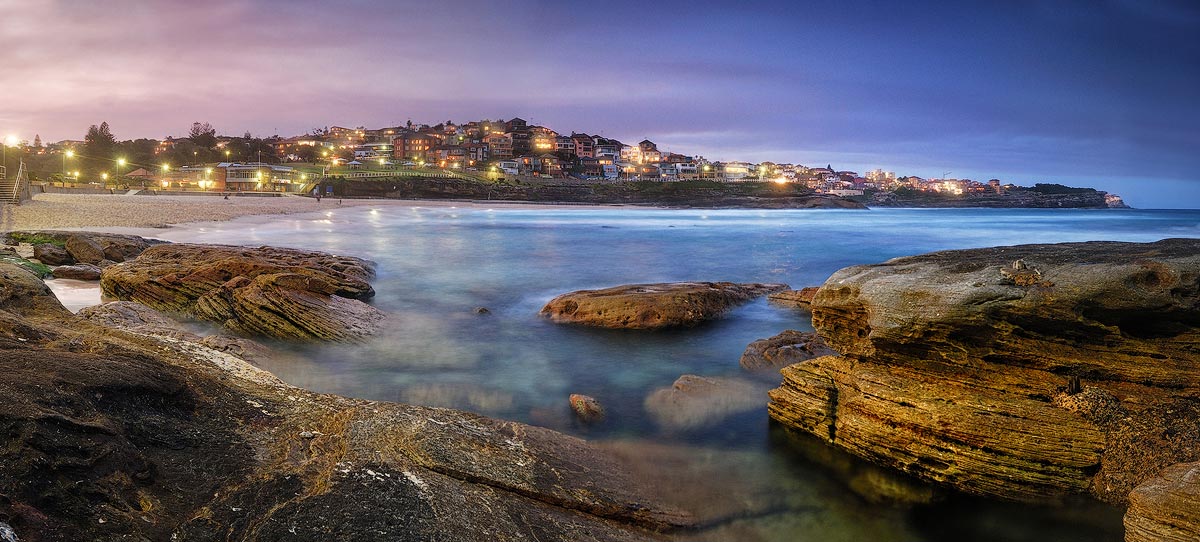
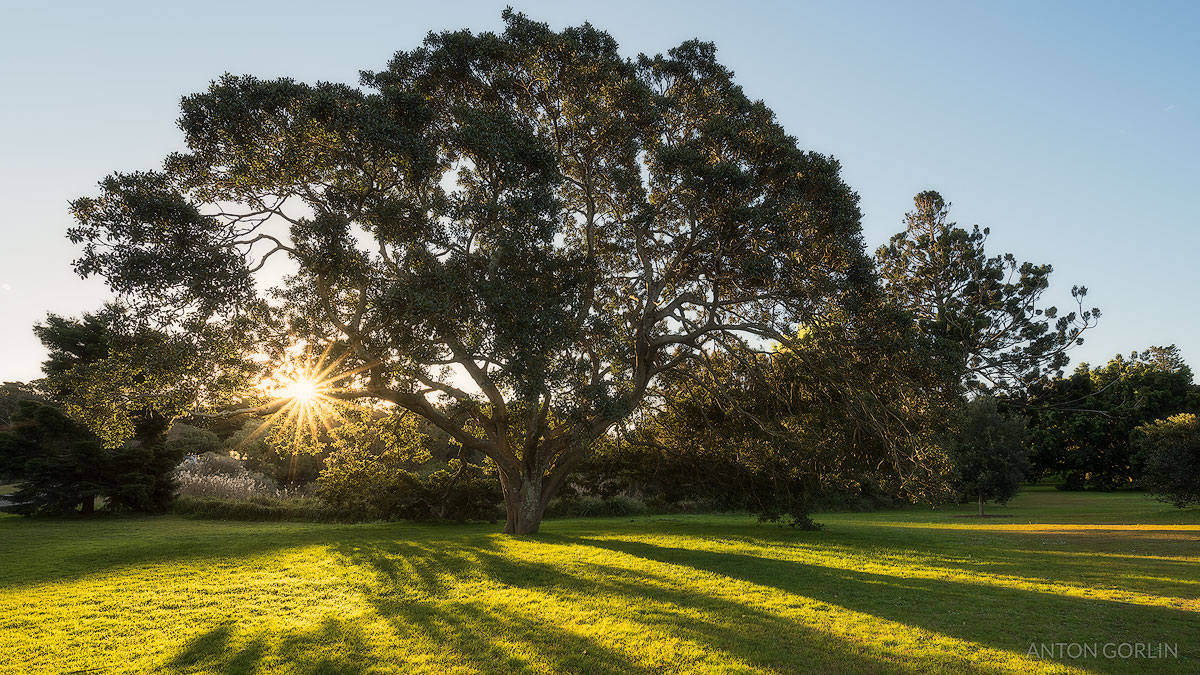
Fewer words, more actions. I’ll just show you a set of starburst photos, which I did just now in the nearest park and you’ll figure it all yourself.
I have created all these photos with Nikon D750 and Tamron 15-30 at 15mm.
Lens Cleaning Is Essential
I have mentioned earlier that you should clean the dust from the front part of the lens. And in the photo below I’ll show you why.
My lens wasn’t too dirty and yet, look at the number of extra flares to clean in Photoshop. That’s at least +10 minutes. And that escalates quickly if multiplied by several shots. To be precise – you cannot get rid of all flares just because the lens is made of glass. Regardless of how well they cover it with the additional coating, there will always be some flares. You can further remove them by trying different angles as even a few degrees shift may result in a significant deduction of flares. There is also another more advanced technique I use to preserve picture quality while shooting into the Sun, and I’ll briefly mention it down below.
Learn even more tricks in the Seascape Photography article I have written.
How To Create Starburst Effect
Seems like, now we are ready to sum it all up into a list.
- Clean the lens, remove all dust
- If shooting the Sun, hide a larger part of it, leaving small portion visible
- Make sure the rays will have a darker background
- If shooting during the night, always use a tripod and keep ISO low
- Set aperture to at least f/11 with f/16 being a better option
- Focus on some solid object, not on the light source as autofocus may get confused
- Fire the shutter, verify and repeat as necessary
Advanced Technique – How To Shoot Into The Sun
The advantages of including the Sun into the photograph are obvious – it’s beautiful and can have those rays etc. However, there are also some disadvantages too – it reduces overall contrast and can produce flares, which are hard to handle afterwards. There is an advanced technique I’d like to share with you. It will also require additional editing, but comparing to the flares removal, it’s rather tiny.
You should make two photographs – one regular and one with the Sun covered. As a result, the second photo will have all original colours and zero flares. And you will need to combine those images later in Photoshop. Earlier, in this Garie Beach sunrise, I had presented a picture of Garie Beach. I have created that photograph using the mentioned technique. Consequently, the final image is well balanced and has no traces of artefacts.
Original photos:
The flare close-up:
The result:
Starburst Effects Gallery
Summary Infographics
You can find other infographics at the Photography Cheat Sheets gallery.
Seems like, I have covered all aspects of the starburst effect photo creation. Feel free to share your opinion and photo in the comment section.
In conclusion, I’d like to mention that sunburst backgrounds make the perfect wallpapers and it’s worth to try and create your own!